Showing posts with label cake. Show all posts

Friday, 4 October 2013

Carrot and Courgette Cake-in-a-mug

I had an over supply of carrots and an over supply of courgette but what I wanted was cake and fast too. 
So what's a girl to do but invent a new 'microwave in your mug' 10 minute cake? 

I admit I had to eat several samples before I got the recipe right but as none of them tasted too bad (mostly they were just soggy) it was no hard work.

This is the first one I got right but I had to make it again to be sure. Of course then I had to eat that too and this may possibly be why I've lost no weight this week. 


Who can eat it?

This recipe is gluten and wheat free, dairy free, egg free and nut free. It is suitable for vegetarians, vegans and coeliacs and anyone in need of a fast cake!

Who can't eat it?

It's cake and therefor not suitable for those needing a reducing diet however I have tried to keep the sugar content low and I think it would probably work OK with a powdered sugar substitute (to be honest most of the trial runs went wrong because I was trying to be clever with natural liquid sweeteners but I think a powder would work). This recipe is also rather high in fibre so it may not be suitable for those with Crohn's, colitis or IBS but it will depend on their condition at the time.

Ingredients

Dry mix
1/4 cup of rice flour
2 tablespoons of sugar (white or light brown)
1/8th teaspoon of cinnamon 
1/8th teaspoon of mixed spice (or pumpkin pie spice if you are in the US)
1/4er teaspoon of GLUTEN FREE baking powder
1/8th baking soda/sodium bicarbonate
1 large pinch of salt

Wet mix

Half a small, finely grated carrot and half a small, finely grated courgette which together should make 1/4 of a cup if you compact it (don't lose any juice, it's tasty!)
2 teaspoons of ground flax powder (yes I know this is technically dry but bare with me!)
1 tablespoon and 1 teaspoon of sunflower oil
1/4 teaspoon of natural vanilla essence 
1/4 teaspoon of cider vinegar (or 'white vinegar' if you don't have this)

Some water, about 1 tablespoon.

1 handful of raisins - remember raisins are often coated with palm or coconut oil (which I'm allergic to) to make them shiny, I use one small treat-sized box of Sunmaid raisins because I know they don't coat them with anything and they are just the right size.

You will also need a mug suitable for the microwave and either a couple of small mixing bowls or one small bowl and a half pint mug.

Method


Prepare your dry mix and stir well. 
Grate your carrot and courgette really finely into another bowl. Add the flax and other wet mix ingredients and stir well. The flax powder is now absorbing the moisture and will act like an egg. I chose to use flax because a) I have plenty in the fridge and b) it's keeps the recipe vegan and c) I don't like using half an egg and wondering what to do with the rest!
Now tip the wet mix into the dry mix and combine quickly to an even consistency then add the raisins. Now you'll have to look at the mix and decide how much water to put in. If your veg were really juicy you might only need 5ml, if they were dry you may need 20ml. You are aiming for a consistency that's a bit like wet mud, not runny but not like the sandbox on a damp day either.
Give it one more quick stir and quick as a flash tip the whole lot into your microwavable mug and pop it in! 
My microwave is 700W and at that setting this cake takes 2 minutes. 1000W will probably take about one and a half minutes. When it comes out the cake should have risen and will no longer look damp in the middle.

The really tricky bit is waiting for it to cool, running a knife around the edge and getting it out in one piece, I have to be honest and say I failed at this, both the first time I got it right and the second and the third. (I'll keep trying ;D) 

This cake was really, really easy. So easy my girls did it themselves and we still had cake in about 15 minutes. Please prepare yourself for cute shots of their little hands now!


And of course they had to lick the bowl clean! 


On this occasion we made double quantities and split the mixture between 4 little glass ramekins. We doubled the time in the microwave and when they we ready we ate them with a nice blob of half-fat creme fraiche on top! 


Everyone was very happy. The End.


Tuesday, 19 March 2013

Chocolate 'cup-cake' for one

I admit this post is a bit of a cheat, I've written this recipe before here (scroll to the bottom half) but it's been so popular, not just with you dear reader but with my own family however it wont show up on my smart phone, so I can't check the quantities on the move (I am terrible at remembering these things). So here it is again.

The microwave mug cake recipe


Who's it suitable for?

It's egg free, it's nut free, it's yeast free, it's wheat free, it's vegetarian and also vegan and it's coeliac friendly. It's not high fibre but the high levels of cocoa may not be suitable for all sufferers of IBS and Crohns, best to check. And it does contain high levels of sugar and fat (oil) so it's not suitable for those on a reducing diet.

It is extremely suitable for young children to make on their own (with a little supervision). Apart from the fact that they LOVE the result ("a whole cake, just for me?!!) it helps them with measuring and pouring skills as well as reading, maths and science (reversible and irreversible changes). The fact that the result is nice and quick is also a bonus in retaining their interest. Just watch the temperature when it comes out of the oven.


Ingredients

1/4 of a cup of rice flour (or other gluten free flour, but rice flour works best)
1/4 of a cup of sugar
1 tablespoon of (diary and gluten free) coco-powder
a pinch of gluten free baking powder
1 tablespoon + 1 teaspoon of oil
3 tablespoons of water
1 drop of vinegar (do not trust yourself to pour this out of the bottle, pop some on a spoon and from there add one drip!)

Add all the dry ingredients to the mug and mix, add all the wet ingredients, mix and pop in a microwave for about 2 minutes (mines a 700W, if yours is more powerful reduce the cooking time). And hey-presto one cake!! Eat from the mug while still warm, maybe add a blob of cream!


Thursday, 22 November 2012

More yummy cakes!

I'm a little bit cake obsessed at the moment (always?!) 

I love cake, chocolate cake, plain sponges, Christmas cake, apple cake - the list is endless. I want you to know that I selflessly test each and every recipe before I put it up and the whole family likes to give it a taste-test too! So I was a little disappointed when the cake my girls called 'the best cake EVER' wasn't actually one of my own.

OK I did bake it but it wasn't one of my recipes, it was a packet mix.

In general I don't like packet mixes. In my opinion you are just paying a whole lot of money for someone else to do the weighing for you and that's a job I think I'm actually quite good at, well I'd have to be, I'm a trained chemist (think laboratory not pharmacy) and used to have a job which involved selling high end balances. However I'm not so narrow minded not to realise that packet mixes do have their up sides, they are good if you are in a rush or if they contain an essential ingredient that you'd rather not have to buy in larger quantities. This second factor can really work in your favour if you are suddenly having to cater for an allergy that you don't normally have to worry about. If your family are more than happy eating gluten you probably don't want or need a box full of gluten free flours you are never going to use again. So for you lucky people a packet mix is possibly ideal when my family or someone equally intolerant comes to stay!

So where did this yummy packet cake mix come from? My local garden centre! I know, I went in there for some Christmas bulbs and suddenly I'm buying cake mix!! To be fair most garden centres have diversified in order to bring in more business and frankly my local one is so diversified it can be hard to find a really plant in the indoors bit. Next to the 'bird food' bit they have this lovely little bit selling dried fruits, nuts and dragées (which as far as I can tell is just a posh word for sweet). This section has it's self diversified and now has teas and a small range of gluten free foods (yippee!).

I was delighted when I picked this little packet up to read that I wasn't allergic to any of the ingredients. In fact I think this was possibly one of the most inclusive packets I have ever read! It was Gluten, Wheat, Dairy, Corn and Soya free and promised that it could be make with vegan margarine and egg replacement powder if so wished! In fact there were 3 similar mixes there, the girls rather predictably chose the chocolate flavour, so we added it to our basket and went home.

It was very quick and easy to do, though I was grateful my electric whisk was such high quality, I had been tempted to hand whisk to save on the washing up and that would never had worked, so thick was the mixture. Anyway we melted our butter, beat the eggs and whisked it all together, popped it in the lined tin and settled down to lick the bowl clean. 


Just so you know, as soon as I'd taken this shot she threw the bowl on the floor so she could see the photo. I now have one Mason Cash bowl less in my collection, luckily unconditional love means you can forgive your child for doing this. Delicious cake also helps to heal the pain.

By the time I'd cleaned up the mess the cake was more or less cooked (it said 25 minutes on gas mark 3 if you were doing it in one tin, in my opinion 35 minutes would have worked better, though I took it out at 30 and it sank a little).

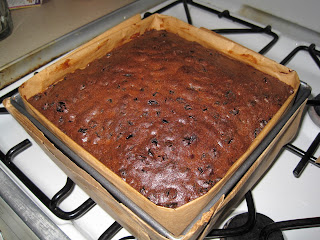
It was very yummy.  "The best cake ever" apparently. A beautiful texture, so soft and moist and not a hint of grittiness or bitterness you can get with gluten free flours. 

Bet you'd like to know who made it wouldn't you? ME! No, I baked it. Glebe Farm made the mix. And it's not the only one they do. So far we've tried the carrot cake, to which I gave top marks (I even preferred it to the chocolate cake!)

And we've also got a ginger cake to make next.

Sadly this is all the mixes my local garden centre stock and I've not been able to find anyone else nearby who has them. I say 'sadly' because they have lots more to try including a scone mix. Luckily they have an on-line shop though with £5.99 p+p you might want to order quite a few in one go (though you don't have to limit yourself to the cake mixes they have many other things to buy).

Who is it suitable for?

Vegetarians, vegans, gluten intolerant and Coeliac, dairy intolerant, those with an egg allergy. Most people in fact.

Who is it not suitable for?

Those on a reducing diet (well it is cake!) and anyone sensitive to potatoes or sugar.

So there you go, a huge well done to Rebecca Rayner and her family for producing such scrumptious stuff !  By the way I don't know them, I've never met them and they are not paying me for this. I'm just letting you know about it because I like to share delicious inclusive food with you!

Tuesday, 13 November 2012

Chocolate cake inclusive style!!

-->
Just to prove I can do baking without the need to use diary or non-dairy margarine I thought I'd share the recipe I use for my chocolate cakes. 

The recipe originally came from my brilliant and talented cook of a sister-in-law as 'Never-fail Chocolate Cake'. It might have been 'never-fail' with wheat flour but let me tell you this has taken a fair bit of tweaking to get into a gluten-free cake that does rise and doesn't fall apart. It's my understanding that the original recipe comes from America and that explains why all the measurements are in cups and teaspoons. No weighing out? Suits me!! There's also no need to sieve the flour which is also a bonus.

Who's it suitable for?

Well it's egg free, it's nut free, it's yeast free, it's wheat free, it's vegetarian and also vegan and it's coeliac friendly. It's not high fibre but the high levels of cocoa may not be suitable for all sufferers of IBS and Crohns, best to check. And it does contain high levels of sugar and fat (oil) so it's not suitable for those on a reducing diet.

Ingredients:

3 Cups sugar, granulated will do but Castor works better.
3 Cups gluten free flour*
1/4 C cocoa powder
1 teaspoon salt
1 1/2 teaspoonsodium bicarbonate
1 Cup vegetable oil (Rape oil)
2 Cup cold water (from the fridge if possible)
1 1/2 teaspoons white (distilled) vinegar
3 teaspoons vanilla essence


*A word about the flour, the 'all purpose' blends I tried did not do well, although I suspect a 'bread blend' would. I use 2 cups rice flour, one cup maize starch (in the UK some, but NOT all 'cornflours' are maize starch). I also add 1 level teaspoon of xanthan gum powder. 

Rape oil - I've tried other oils, it did NOT go well, even sunflower oil was a bit off and olive oil was awful. Obviously I wont touch coconut oil with a barge pole because of the allergies but I do wonder if that wouldn't be a good flavour (though you will have to use warm water and reduce the sugar), I'd be interested to hear how you get on if anyone tries it.

Cocoa powder - take care which one you chose as many brands try to sneak wheat and milk in there. I use Green and Blacks Cocoa powder because it's organic and Fairtrade and most importantly it tastes nice!

Method

Pre-heat your oven to 175C or gas mark 3 to 4.

Get your cake tin ready. I tray bake this in a 9x13 inch tin but you could put it in two 8inch round sandwich tins. I always line the tins with greaseproof and grease the paper as well because as I've said before gluten free cakes stick and this inhibits rising.

Mix all dry ingredients well in large bowl, you don't need to sieve but do make sure they are well mixed, I just swizz it around with my hand whisk.  

In a separate jug mix all the liquids (I say mix, leave it one second and the oil will float to the top, it doesn't matter!)

Now remember that time is of the essence for the next bit so move with haste but not with speed or your cake wont rise. Add all liquids to dry mixture and mix thoroughly, mix it well but DO NOT beat.

Pour it quickly into the tins and slam it into the middle of your oven.

Bake for 40 minutes for 2 round tins, or 60 minutes for the large rectangular tin. You want the cake to 'bounce back' in the middle when it is ready, don’t over bake as it gets very bitter and don't open the oven in the first three quarters of the cooking time as a constant temperature is crucial to rising.


I'll be honest and say that this mix doesn't make the greatest fairy cakes, cup cakes or muffins, this is mostly because it doesn't support the weight of icing very well. However the large tray bake can cope with chocolate frosting and buttons on and because it is so large is super for kids parties.

So looking back at the previous post, how does this cake rise when it has just has oil and not solid fat? It's the sodium bicarbonate, reacting with the vinegar to produce nice little bubbles of carbon dioxide gas which will lift your cake up. You want to keep the reaction very slow until it gets cooking, hence using cold water from the refrigerator, once it starts getting hot the reaction goes full pelt but by then your cake is turning solid and the bubbles get stuck stopping your cake from being a solid lump. If you've got the chemistry all right all the vinegar eats up all the sodium bicarb, your cake is 'neutral' and delicious! If your cake does taste a little 'funny' try being more accurate with the measuring of the vinegar and bicarb or using a little less, also watch out that you haven't over baked it as burnt gluten-free flour is bitter. 

Over all this is the simplest cake I have ever made (now I've got the recipe sorted). It is so quick I can go from walking in the kitchen door to 'cake-in-the-oven-and-all-washed-up' in 15 minutes giving me at least three quarters of an hour to get on with other stuff before I have to take it out of the oven and fight the rest of the family off until it's cool enough to eat!

Hope you like it too. xxx


UPDATE!

It turns out that scaled down this works great as a microwave in the mug cake recipe.


1/4 of a cup of rice flour
1/4 of a cup of sugar
1 tablespoon of (diary and gluten free) coco-powder
a pinch of gluten free baking powder
1 tablespoon + 1 teaspoon of oil
3 tablespoons of water
1 drip of vinegar (do not trust yourself to pour this out of the bottle, pop some on a spoon and from there add one drip!)

Add all the dry ingredients to the mug and mix, add all the wet ingredients, mix and pop in a microwave for about 2 minutes (mines a 700W, if yours is more powerful reduce the cooking time). And hey-presto one cake!! Eat from the mug while still warm, maybe add a blob of cream!


Wednesday, 7 November 2012

"Here Comes the Science" or "Where is that vegan christmas cake recipe?"

A few posts ago I promised you I'd work out a vegan version of my Christmas Cake recipe. I've been trying, really I have, but in fact I haven't got even close to baking a trial run and here's why - I can't find a vegan shortening (baking fat) that I'm not allergic to. 

Trust me, I've tried. I've stood in various supermarkets reading the back of all the dairy-free margarines and fats, I've tried health food shops, pestered vegan experts, heck I even went across to the other side of a neighbouring city to pick the brains behind a wholefood warehouse and still no luck, every one of them seems to contain either coconut oil or palm oil or both. For the packets that just said 'vegetable oil' I've taken a note of the customer helpline and either phoned or emailed them to see what the fat might be. Most of the brands I've contacted have been very helpful only a couple declined to tell me if their products actually contained coconut or palm but even then they did tell me that "it is not suitable to your dietary needs".

When I come across a problem such as this I like to ponder on the science of it before I come up with an answer, if there is one. Sometimes I'm sure the word 'science' runs through me as surely as the words through a stick of rock. In fact science is my rock. So here is my theory......

First off you need to understand that different fats have different melting points, in fact a high melting point is pretty much the definition of a fat because if it's already melted at room temperature we tend to call it an oil. For example, sunflower oil turns from a solid into a liquid (melts) at about -17ºC where as butter melts at 35ºC, in fact the only natural vegetable oils which are still solid at room temperature are coconut and palm (though both melt at about 25ºC so your room better not be too hot!)

So could we alter any natural plant fats to make them melt at a higher temperature? Yes, we can take them through a process called hydrogenation, where hydrogen gas is forced through the oil under very high pressure. This adds hydrogen atoms to the fat molecules making them in effect heavier and so have a higher melting point. (I know it's actually more complex than this but I'm trying to avoid an A-level chemistry lesson here).  Furthermore it has the added advantage of stopping the fat from going off (rancid) so it stays fresher for longer. So why don't we see hydrogenated fats on supermarket shelves? Well you used to see a lot of it, then in the 1990's scientists began to notice that the more hydrogenated fat a person consumed the higher their cholesterol was. This is NOT a good thing, higher cholesterol of this type has been linked to weight gain, heart disease and diabetes. Most food companies are therefor trying to reduce the amount of hydrogenated fat in their products (sometimes they needed a little pressure from the government to do it though).

OK, so if I can't get a room temperature fat that works then how about using an oil? Lets look at what the fat does in baking. Fat carries flavour, it tenderises, it makes the food feel nice in our mouth and it gives that quintessential element called 'crumb'. But most of all we need fat in baking to help trap the air bubbles that stop our cakes being like 'dwarf-bread', more weapon than food. 
When we whisk the butter and add sugar the purpose of our whisking is to trap air. This is why you need the butter gently softened but not melting, in fact better to start with the butter too cold and keep whisking until it goes 'plastic' and starts to hold air than risk it completely melting under the heat of the beaters. Use an oil and it just wont trap any air, so swapping the butter for sunflower oil just isn't going to work and if you are going to use coconut or palm to do the job you'd better be cooking in a cool room (remember it melts at about 25ºC).

So to put it plainly I can't get a vegan alternative to butter that I'm not allergic to because unless you get something that's hydrogenated (and I think we are all agreed that that would be very bad for our health) it's going to contain either coconut or palm and much as I love you and cooking I'm not prepared to spend days in a darkened room suffering for it!

IF you really want to make a vegan version of my Christmas Cake here's what I suggest; replace the eggs with egg replacement powder which you can get from some pharmacies and plenty of health food shops then replace the butter with vegetable shortening (not vegetable margarine which wont trap enough air and contain too much water), if you've never used that before I suggest you look for Trex which is easily available in most supermarkets and can be used as a direct replacement (do not reduce the fat by 10% as it suggests on the packet, it is working as shortening not margarine). And don't forget to keep the room cold while you are whisking.

Fear not though, I can and do bake vegan cakes on a regular basis without the need for a diary-free margarine, I will treat you to the recipe for the chocolate one shortly.

So as one customer service agent said to me recently "thank you for your understanding". xxx

Monday, 29 October 2012

Christmas Cake Part 2 - Getting sticky!

The Autumn Half-term break is over. The girls and I had a lovely week crafting, pumpkin carving and most importantly baking the Christmas cake, but now they are safely back at school and I can get onto the computer and type without interruption.

Here's a reminder of the ingredients:

510g Currants

225g Raisins

225g Sultanas

120g Dried ('ready to eat') Prunes

120g Glace Cherries

20g of Candied peel OR 60g of Peel and 60g of Crystallised Stem Ginger

Zest of 1 Lemon

280g Gluten free flour (I use 140g of Dove farm Plain White Gluten Free and 140g of Doves Farm Rice flour)


half a level teaspoon of Xanthan gum (unless you are using a flour blend that already contains it) 


half a level teaspoon each of ground cinnamon, mixed spice and ground ginger

A pinch of salt

280g of dark soft brown sugar

6 fresh eggs (large)

265g Pure Salted Butter (Don't use 'spreadable butter')


1 tablespoon of Black Treacle

3 tablespoons of Brandy plus more later

3 tablespoons of Cointreau plus more later!


I'm going to break this recipe into two halves, making this cake is going to take a couple of hours plus four and a half hours to cook and you may not be lucky enough to get it all done in one go. Stage 1 can be done the day before and sealed in freezer bags before you get on with Stage 2 the next day.


Stage 1 -  It's all in the preparation.


Let's start with the raisins, sultana, currants and prunes. Get a clean washing up bowl and half fill it with cold water, put the dried fruit in and gently give it a swoosh about, this will help to remove the oils used in it's preparation and give you a chance to pick out any less than perfect specimens, in particular look out for stalks that have been left on. If your fruit is particularly oily you may need to strain off the water and repeat the process. I have been known to do the first rinse with the tiniest spot of washing up liquid if the fruit have been very oily or in the days when all the fruit had palm oil on it (it was either that or no cake). When you are happy that you've removed as much oil as possible tip the bowl into a colander in the sink and dry by gently pouring out over a clean tea towel and patting dry or alternatively stick it in the salad spinner.

Now the cake tin. Having selected your tin (9inch round or 8 inch square) you need to cover the outside in a double layer of brown paper. With a square tin put an extra layer on the corners to reduce the risk of burning. My round tin has a double layer base so I don't bother covering that, if yours doesn't you've got some tricky wrapping to do! I secure the paper with the string but you could use staples to hold it together, just be careful later on. Experience has also taught me that if you are careful not to get any mixture on the paper later on then you can use the brown paper case for a couple of years! You also need to make a 'lid' of brown paper to go on later, so turn the tin over and draw around it then cut it out.


It's a little known fact that gluten-free baking likes to stick like glory to the tin, I ALWAYS line the tin with a double layer of greaseproof paper that I've completely smeared in butter/margarine. All this extra padding will help your cake not to get burnt edges. I also cover the brown paper lid in greaseproof so that if it touches the mixture that doesn't stick either. However DON'T grease until baking day - you don't want it going rancid over night.


You are now going to need a large bowl however if you are doing stage one and two on the same day save your very largest bowl for the next bit assuming you don't have two exactly the same size! Use the smaller of your large bowls first, placing into it your washed fruit chopping the prunes into quarters as you go. Chop the cherries and add them, add the lemon zest too and your peel (or mixed peel and stem ginger). 


Onto the fruit sift your flour, salt, the spices and half a teaspoon of xanthum gum if your flour does not contain it. Gently mix until all the fruit is evenly covered. 


If you need to stop here then bag up the fruit into freezer bags and put your cake tin somewhere where the kids wont take the paper to draw on!


Stage 2 - Ready, steady, bake!

Heat your oven to gas mark 1 or 140 C and grease the paper in the tin.

Take your very largest bowl (mine is original Cornish ware inherited from my husband's Granny - I know you are jealous!!) and cream the butter and and sugar together until they are light and fluffy.

In a jug whisk together the eggs and the treacle (top tip on treacle, warm the spoon, wipe the smallest amount of oil across the inside and outside of spoon end and move quick!) then add this mixture slowly to the creamed mixture whisking all the way.

It is traditional at this point to let the kids lick the whisks, two very important points you should note, 1) eject them from the mixer first! 2) this mixture contains raw egg which isn't great for vulnerable people, especially small children or the elderly (I selflessly take the risk for them and lick them myself!!)

Now carefully fold in all the flour and fruit mixture then add one and a half tablespoons of brandy and
one and a half tablespoons of Cointreau and stir gently. (My tablespoons here tend to be a bit 'whoops, that was a bit over', it all adds to the individual flavour!) The rest of the alcohol will be used after baking and is not intended to be consumed by the cook just yet!

Pour the mixture carefully into your well prepared tin and place in the middle of a preheated oven at gas mark 2 for a VERY long time. 


Now settle down with the kids and watch them lick the mixing bowl and spatulas clean!


After about 2 1/2 hours pop that lid over the top and if you're doing a square cake rotate the tin every half hour from here on. Keep baking until a skewer comes out clean which is ABOUT 4.5 hours however at such low temperatures this timing is VERY flexible and if you have a fan oven you may have to reduce this to 3.5 hours. (If you have the chance turn the fan off and throw an ice cube onto the floor of the oven every time you check the cake to keep the humidity up).


Once your cake has cooled spike the top over with a skewer and evenly pour on another one and a half tablespoons of Brandy and one and a half tablespoons of Cointreau. After this has soaked in remove the cake from the tin, peal off the greaseproof, wrap in a layer of clingfilm and place into an airtight tin or box. 

You should 'feed' the cake at least once more with the same amounts of brandy and Cointreau before you ice it. But for now put your feet up and relax, you've earned it!

Thursday, 18 October 2012

Christmas Cake Part 1 - ingredients.

My daughters and I are getting ready to make the Christmas Cake next week. It is a bit of a mammoth task and frankly it would be much easier to do on my own but I really feel that in our family, or at least the sort family that my husband and I want to build, doing things together as a family is what Christmas is all about. And making the food together is as much "Inclusive Cooking" as eating it together is.

I have such happy memories of being able to help my own mum make our family cake. The smells, the arm aching mixing and the taste of licking the bowl afterwards evoke such strong and happy memories. Obviously I've had to adapt the recipe over the years as we discovered my allergy to nuts and my husband's gluten intolerance, so what I'm sharing with you is not my Mum's family recipe, it's my family recipe. Tried and tested and frankly bloomin' brilliant!


Who is it suitable for?

There are no nuts and no gluten, there is dairy and it does have egg, you could go with an 'egg replacement' powder mix if this is your allergy but this year I will trial a vegan version for you and let you know how I get on. My cake also contains plenty of alcohol (Napoleon brandy and Cointreau, which are both vegan), you could try and make it without but it will be dry, it wont have the same rich flavour and I'm not sure how well it would keep so maybe only make it a week in advance. Sadly if you have a citrus allergy your cake is going to lack some of the essential flavours, however if you are only mildly allergic it might be worth investigating whether or not you can tolerate Cointreau, in which case skip the peel (add a little extra crystallised ginger instead) decrease the brandy and increase the Cointreau. 

This cake contains LOTS of calories and is not suitable for a reducing diet!

I'm splitting the ingredients and method into two different blog posts (and the vegan one, if it works out into a third post) because I know some of you are waiting to get started and this will give you a chance to source your ingredients.


The alcohol

As I explained I use brandy and Cointreau. For me these spirits embody some of the strongest scents of Christmas and I will be using them a lot in other posts before the big day so if you can possibly splash out on both bottles then I promise to help you make good use of them (I'll even volunteer to finish the bottles off for you myself!!) If cost is an issue get one or two Cointreau miniature bottles and a half bottle of brandy. (Oh, OK you can have Grand Marnier instead of Cointreau if you want but it wont have my happy holiday memories attached to it!)
Cointreau is distilled after adding the orange flavour so it is possible that if you do have a mild citrus allergy then the chemicals which trigger the sensitivity may be destroyed in the process but you will have to work this one out VERY carefully, certainly don't try if you have anaphylaxis. 


The eggs and dairy

The freshest eggs work best in this so if you can, buy them only the day before you plan to make the cake. Your heart will be happier and so will the chickens if you buy organic free-range ones. You will also need 250g of salted butter. Do not use spreadable butter (even if you are not allergic to it like me), it's got too many other oils and water in for this recipe. The method I use is easier if the butter and the eggs are at room temperature when you need to use them. It would be possible to switch the eggs for an egg-replacement powder if you needed to avoid them.


The Sugars

You will need 280g of dark soft brown sugar. Please consider getting Fair Trade sugar as the growers themselves get more money helping them to have a better Christmas too.
You will also need 1 tablespoon of black treacle.


The Spices

Always buy the freshest, highest quality spices you can afford for the best aroma. You will need half a level teaspoon each of ground cinnamon, mixed spice and ginger. A little crystallised ginger is optional. I know salt isn't a spice but you will need a pinch and I've no other category to put it in!


The flour

I've tried various gluten free flours, maize flour was too course, potato flour too bitter, rice flour on it's own is a little gritty and it needs the 'grip' of the proprietary blends so I compromise with 140g of Dove farm Plain White Gluten Free and 140g of Doves Farm Rice flour, both of which have the advantage of being organic. (If you want to make this recipe with a plain white wheat flour you should note that gluten free flour does not absorb fat well so I've reduced the amount of butter, to get the same texture with wheat you will need an extra 40g of butter.) Half a level teaspoon of xanthan gum also helps but is not essential.


The Fruit

The zest of 1 lemon, make sure it's has an untreated skin, even the organic ones can have some wax smeared on the outside to make them look shiny and taste awful.

Glace cherries, much glace fruit has wheat in it so you have to be careful. I've chosen Crazy Jacks organic glace because they promise there's no wheat and they're organic. You will need 120g.

Candied peel, again Crazy jacks because they use cane sugar. 120g of peel OR 60g of peel and 60g of crystallised stem ginger. I prefer it with the ginger but my little girls find it a bit strong so I've use all peel for the past couple of years.

120g of dried ('ready to eat') prunes, again I like Crazy Jacks but my regular supplier isn't stocking them so I've had to turn to the supermarket own brand.

Currants 510g, raisins 225g and sultanas 225g, by now it wont surprise you that I like Crazy Jacks ones, they are organic but most importantly for me they are not coated in palm oil. 
(RANT WARNING!!)
Dried fruit like this has been a right pain for me over many years, so much dried fruit is covered in a horrid sticky layer of palm oil just so it looks nice and shiny and pours easily out of the bag.  I can't risk eating anything containing dried vine fruits that has been prepared outside of my home, not cake, not cookies not mince pies, not even muesli because the fruits are nearly always covered in palm oil. If I sound sore about it that's because I am and it's not just for me and the similarly afflicted it's because most if it isn't sustainably sourced, it's made by destroying large areas of jungle that also happens to be orangutans homes. If we want these beautiful primates to survive we need to cut our dependency on this oil. Now pass me a cold flannel and we'll move on.

The currents, raisins and sultanas will all still have some oil on them, (even if it is organic sunflower oil) I find I get much better result if I rinse all three in cool water a couple of times just before I use them. (Top tip to dry them, pop them in the salad spinner, but do it gently!)


Just one more word about all this lovely fruit so I can say a big thank you. Last year I had real problems getting Crazy Jack stuff particularly the currents, my local health food shop were brilliant at trying to get the stuff for me and helped me try to find an alternative. After a long Internet search I found a different brand stocked by place in Brighton. I'd like to thank the staff at both places for the help they gave me last year so that my family cake was ready in time. So here's to Elf Foods and Healthy Supplies.

And finally...
Now you just need to find yourself a very big bowl, an electric whisk, a 9inch round or an 8inch square cake tin, some greaseproof paper, some brown paper and some string, some clingfilm, some baking foil, a large board to mount the cake on and a whole heap of icing!


Part 2 - Getting Sticky!